This is an article how to create a new footer menu and add the desired pages to the footer menu later.
What is “footer menu”
Posts created as “fixed pages” on the blog, such as Contact Us or Privacy Policy, will not appear on the site when the post is published.
Therefore, they must be configured to appear somewhere on the blog, generally by adding them to the footer menu. Once the footer menu is created, a text link to the fixed page will always appear at the bottom of the page, no matter which post page is viewed.

How to add footer menu
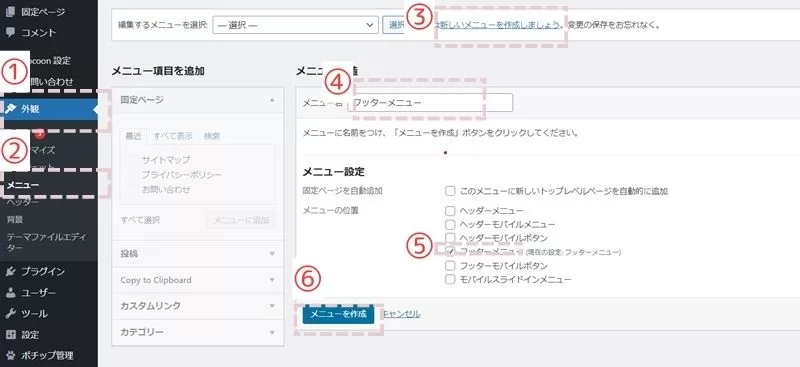
- Click on “Appearance” in the WORDPRESS administration screen
- Click on “Menus
- Click on “Create New Menu”.
- Enter a name for the menu. (I chose “Footer Menu” for clarity, but you can use any name you like.)
- Click the “Footer Menu” checkbox.
- Click “Save Menu
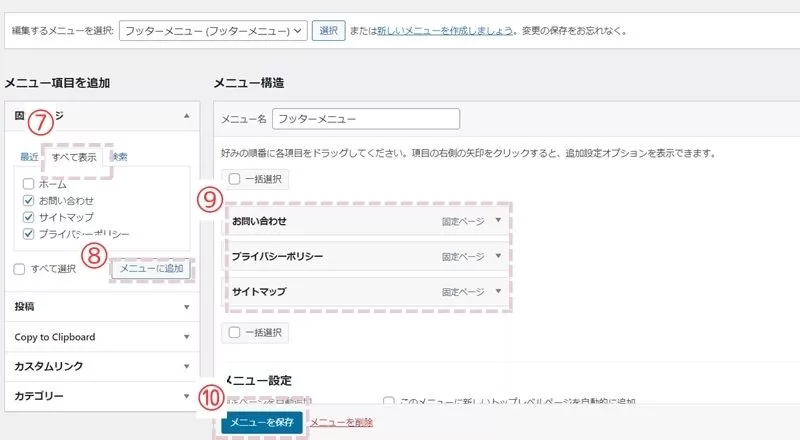
- When “Add Menu Items” appears on the left side, click the “Show All” tab
- Check the items you want to add to the footer menu and press “Add to Menu”.
- Check if the pages you want to add to the menu structure appear & if you want to rearrange the order, drag & drop to change the order.
- Press “Save Menu.”
- Check the actual page to see if the footer menu appears and you are done!
How to add the desired page to the footer menu later
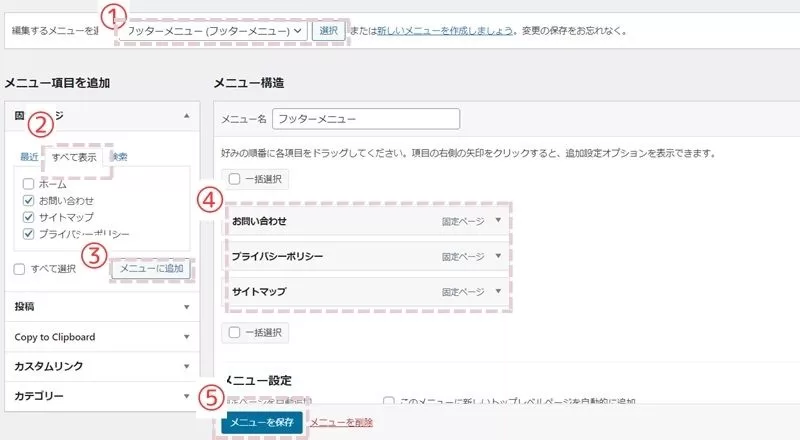
Click “Appearance” -> “Menu” on the WORDPRESS administration screen to display the menu.
- Select “Footer Menu” from the drop-down list and press the “Select” button.
- Click on the “Show All” tab for additional menu items on the left
- Put a check mark in the page name of the fixed page you want to add and press “Add to Menu”.
- Check that the fixed pages you have added are displayed in the menu structure. If you want to change the order, do so.
- Press “Save Menu.”
- Check that it is added to the footer menu on the actual posting screen and you’re done!
Suggested pages to add to the footer menu
HTML Sitemap
Read this page in Japanese


コメント